6.10.2012

roasted garlic-cumin chicken over couscous

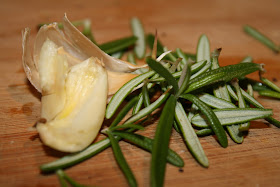
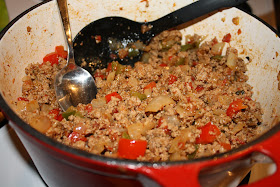
A couple of weekends ago, a big storm was headed our way. Not sure if we would lose power - or for how long, if we did - I decided it was a good time to make one really good last meal. I picked this up from Anne Burrell on the Food Network partly because I have always wanted to make roasted garlic. This recipe calls for two whole heads of garlic, but roasting it brings out an earthy sweetness that is just awesome with the chicken and whole-wheat couscous. 

Chef beware, however: as delicious and healthy as this meal is, it is an all-day affair. Make it when it's raining out and you want to be stuck in the kitchen. :)

Roasted Garlic-Cumin Chicken over Couscous
Ingredients
  • 2 whole garlic bulbs
  • 1 lemon, zested and juiced
  • 1 large bunch thyme, leaves only
  • 1 tablespoon cumin seeds, toasted and ground
  • Pinch crushed red pepper flakes
  • Kosher salt
  • Extra-virgin olive oil
  • 1 (4 to 5-pound) chicken*, cut into 8 to 10 parts
Couscous:
  • Kosher salt
  • 1 1/2 c whole-wheat couscous (or 2 cups medium-size Israeli couscous)
  • Extra-virgin olive oil
  • 1 large onion, sliced
  • 3 ribs celery, sliced thin on the bias
  • Pinch crushed red pepper flakes
  • 1 1/2 cups dry white wine
  • 3 tablespoons tomato paste
  • Large pinch saffron
  • 2 zucchini, green part only, cut into 1/2-inch dice
  • 2 cups chicken stock, divided
  • 1/2 cup pine nuts, toasted
  • 3 scallions, white and green, sliced thinly on the bias

Directions
Chicken:
  • Preheat the oven to 375 degrees F. Put the garlic bulbs (still in their natural casings) directly on an oven rack and roast them until they are soft when squeezed, about 30 minutes. Remove them from the oven and let cool.
  • When the garlic bulbs are cool, slice the tops off and squeeze out the roasted garlic. Add the garlic to a food processor or a bowl, along with the lemon zest, lemon juice, thyme, cumin, crushed red pepper and salt, to taste. Add a little olive oil and puree or mash into a loose paste. Massage the mixture all over the chicken pieces and let sit for at least one hour.
Couscous:
  • Cook couscous according to package directions. Drain and reserve.
  • Coat a large saute pan with olive oil over medium-high heat. Add the chicken to the pan and brown it on all sides. Remove it to a plate, drain the fat and add the onions and celery. Season with salt, to taste, and the crushed red pepper. Deglaze with white wine, scraping up all the crud on the bottom of the pan and cook the onions and celery for seven to eight minutes. Stir in the tomato paste and cook for another 2 minutes. Add in the saffron, zucchini, cooked couscous, and 1 1/2 chicken stock. After stirring, dish should be juicy and moist, but not soggy. Taste and adjust seasoning, and add more broth, up to 2 c, if needed. Transfer the mix to an ovenproof dish. Nestle the chicken, skin side up, in the couscous and cover with foil. Add some more chicken stock to keep everything nice and moist. Sprinkle with pine nuts and cover with foil. Place the baking dish on a sheet pan.
  • Roast the chicken for 20 minutes, covered, then remove the foil and roast for another 10 to 15 minutes.
  • Remove the chicken from the oven and top with scallions before serving.
*Note: Save the bones and make homemade chicken stock!

5.29.2012

chicken skewers with spicy peanut sauce


You know how I feel about peanut butter. (And, in case you don't, let me fill you in: it borders on obsession.) Peanuts are a food you can feel good about eating because of their super-charged monounsaturated fat, which is a nutrient noted for its cardiovascular benefits. I've also read that peanuts have an antioxidant in them that is good for skin recovery, so make this after a day in the sun.

This peanut sauce, which also brings super-healthy fresh garlic and ginger into your life, comes together quickly in a food processor and makes a great dip for veggies the next day. Serve it with a light and fresh side dish - I did sauteed spinach and steamed summer squash - and feel good about dinner tonight.

Chicken Skewers with Spicy Peanut Sauce
Makes four servings 


  • 1/2 cup chicken stock or broth
  • 1/2 cup light coconut milk (shake the can before pouring!)
  • 2 tablespoons low-sodium soy sauce
  • 1 shallot or onion, sliced thin
  • 1 clove garlic, minced
  • 1 1/2 teaspoons Thai fish sauce (or 2 additional teaspoons low sodium soy sauce)
  • 1 tablespoon brown sugar
  • 1/2 teaspoon lime zest
  • 1 tablespoon minced fresh ginger
  • 1 pound skinless, boneless chicken breast pounded slightly and cut into 1-inch strips
  • 8 (8-inch) skewers, soaked for 20 minutes
  • 3/4 cup spicy peanut dipping sauce, recipe below
  • 2 tablespoons minced fresh basil or cilantro leaves
  • 1/4 cup chopped toasted peanuts

Directions

  1. In a medium sized bowl, whisk together the chicken stock, coconut milk, soy sauce, shallot, garlic, fish sauce, brown sugar, lime zest, and ginger. Add the chicken strips and marinate for at least an hour. Remove the chicken from the marinade and discard the marinade.
  2. Skewer the chicken and preheat a grill to medium heat. Cook two to three minutes per side until meat is cooked through and has light grill marks. (You could also broil these until juicy and just done, flipping halfway through the cooking.)
  3. Serve chicken skewers with sauce, and garnish with basil or cilantro and chopped peanuts.


Spicy Peanut Sauce:
Sauce can be made a day ahead of time, and will keep three to four days in the refrigerator. It doubles as a yummy, healthy veggie dip for next-day snacking.

  • 1/2 cup natural creamy peanut butter (skip the overly processed or reduced-fat varieties - you'll miss out on this food's natural goodies!)
  • 1/4 cup low-sodium chicken broth
  • 3 tablespoons low-sodium soy sauce
  • 1 1/2 tablespoons brown sugar
  • 1 1/2 tablespoons minced fresh ginger
  • 2 tablespoons lime juice
  • 1 teaspoon minced garlic
  • 1/2 teaspoon chili flakes
  • 1 teaspoon red curry paste
  • 1 shallot, peeled and roughly chopped

Place all ingredients in blender and blend until smooth. Serve with grilled chicken skewers.

5.28.2012

chicken with mushroom-wine sauce


This could be the easiest, tastiest weeknight meal ever. Use pre-sliced, pre-cleaned mushrooms and you'll find that the most difficult part is opening the bottle of wine. Whew, I'm exhausted just thinking about it. Pair it with steamed veggies or a salad and you've got a powerhouse lean, easy meal. Enjoy.

Chicken with Mushroom-Wine Sauce
  • 2 skinless, boneless chicken breasts, butterflied into 4 thin pieces
  • 2 teaspoons canola oil 
  • 1/4 cup chopped shallots  or onions
  • 8-ounces mushrooms, sliced
  • 2 minced garlic cloves 
  • 1/2 cup dry white wine (or extra chicken broth)
  • 1 1/2 teaspoons all-purpose flour 
  • 3/4 cup fat-free, lower-sodium chicken broth
  • 1 tablespoons butter
  • 1 teaspoon minced fresh thyme
  • Salt and pepper


Heat a large nonstick skillet over medium-high heat. Add canola oil to pan; swirl to coat. Sprinkle chicken with salt and pepper, to taste. Add chicken halves to pan; cook until lightly seared (as shown) and just done. Transfer chicken to a serving platter; tent with foil and keep warm.


Add shallots and mushrooms to pan; sauté for 4 minutes or until browned, stirring occasionally. Add garlic; sauté for one minute, stirring constantly. Stir in wine, scraping pan to loosen browned bits; bring to a boil. Cook until liquid almost evaporates.

Sprinkle mushroom mixture with remaining 1/4 teaspoon salt and flour; cook 30 seconds, stirring frequently. Add broth to pan; bring to a boil. Cook two minutes or until slightly thick. Remove pan from heat; add butter and thyme, stirring until butter melts. Serve with chicken.

Not what you're looking for? Try these other chicken ideas:

5.06.2012

pasta primavera with chicken sausage

Some of the best meals come from cleaning out my refrigerator. After a long day out on the boat with family, I wanted something quick and filling that would amp up our veggie intake. I loosley followed a recipe I found a while ago, but added a few twists to up the flavor, such as sauteing the veggies in the same pan the lean chicken sausage was cooked in. Use whatever veggies you have one hand and mix it up when you want something fresh. You won't be disappointed!


Pasta Primavera with Chicken Sausage
  • 8-12 oz. corkscrew or penne pasta, whole grain if possible
  • 1/2 lb. broccoli florets or snow peas (or a combination)
  • 3 fresh, lean chicken or turkey sausage links (bratwurst size)
  • Baby portobello mushrooms (about 10), sliced in half or thirds
  • 1/2 small yellow onion, sliced
  • 1/2 bell pepper, thinly sliced
  • 3-4 garlic cloves, chopped
  • 1 pint cherry tomatoes, halved
  • 1/4-1/2 tsp. crushed red pepper
  • 1/2 c chopped basil
  • 1/2 c grated Parmesan cheese
  • 4 oz. herby goat cheese, crumbled
  • Salt and pepper
  1. Bring a large pot full of salted water to a boil. Add pasta and cook until almost soft. During the last two minutes of cooking, add the broccoli and/or snow peas. Drain and set aside, reserving 1/4 c of cooking liquid.
  2. Meanwhile, in another large pot, grill the sausage links in a little olive oil until dark brown and cooked through. Remove from pan and cover in foil. To the pot, add the mushrooms and a little more olive oil. Saute about 4-5 minutes, scraping up any bits on the bottom of the pan. Add onions and peppers. Saute 4-5 minutes, until just soft. Add the garlic and saute another minute or two.
  3. While the onions and peppers cook, slice the sausages into rounds. Add sausage rounds, tomatoes, red pepper, noodles, broccoli and reserved water to the vegetables and stir gently together. Add goat cheese and most of the Parmesan and basil. Taste and season with salt and pepper as needed. Top with remaining basil and Parmesan and serve.
Note: This recipe is super flexible and will take nearly any type of veggie replacement. Try adding asparagus, spinach, shredded carrot, squash or whatever else you have hanging out in the fridge. Tender veggies should be added to the pot with the tomatoes; firmer, tougher ones should be added with the onions.

4.30.2012

fish tacos with mango-avocado salsa and goat cheese


This is such a simple, beautiful and delicious meal. The fresh avocado, mango and lime brighten up the sweet, mild roasted red pepper with a shock of rainbow color. The spicy sriracha is cooled by the creamy goat cheese and clean-tasting cilantro. This took less than 20 minutes to throw together and is true health food. Make this on a busy weeknight and skip the delivery pizza!

Fish Tacos with Mango-Avocado Salsa and Goat Cheese
Salsa
Makes enough for four to six tacos
  • Two mangoes, chopped
  • Two avocados, chopped
  • 1/4 c red onion, finely chopped
  • 1/4 c roasted red pepper, chopped
  • Juice of one lime
  • Handful fresh cilantro, chopped
  • Salt and pepper
Fish tacos
Makes enough for about four tacos
  • 1 lb. fresh fish, such as tuna
  • Small corn tortillas
  • Sriracha
  • Fresh goat cheese, crumbled
  • Salt and pepper
Cook the fish in a little olive oil over medium heat. Sprinkle with sriracha sauce, salt and pepper. While the fish cooks, stir together salsa. Remove fish from heat, slice it into strips, and distribute evenly in the tortillas. Top with salsa, goat cheese and more sriracha. Serve immediately.

4.26.2012

4.22.2012

sunday ham & cheese pasta salad


This was so crazy good. I didn't have spinach the first time around, but it called for it and I wished I had it! Next time I make it, I will be sure I do, and I may even experiment with adding a bit of Dijon mustard to the dressing. Served with a bright, green salad (using leftover scallion vinaigrette), this made a quick and tasty meal - though, eater beware, it is high in fat due to the dressing and cheeses. I also brought it for lunch the next day, as shown in the photo below, at work served over spring mix and it was delicious. This would also be great to bring to a party or picnic. Enjoy!

Sunday Ham & Cheese Pasta Salad 
Yield 4 to 6 servings
Ingredients:
  • 1 egg*
  • 1 cup extra virgin olive oil
  • 1/2 cup grated Parmesan cheese 
  • 1/4 cup white wine vinegar
  • 1/4 teaspoon ground cloves (trust me, it's good!)
  • 8 ounces corkscrew, whole-grain pasta
  • 10 ounces fresh spinach, stemmed and roughly chopped
  • 8 ounces cubed cheese, such as Colby-jack or mozzarella
  • 8 ounces ham, chopped (from the deli is fine)
  • 1 pint grape tomatoes, cut in half
  • 2 ounces Parmesan cheese, for garnish 
  • Salt and pepper, to taste
  1. To make the dressing, place egg in a bowl. Whisking constantly, slowly add the oil to the egg and whisk until thickened. Add the Parmesan cheese, white wine vinegar, and ground cloves and whisk until fully incorporated. Season with salt and pepper. Set aside.
  2. Cook corkscrew pasta according to the directions on the package. Drain well. Toss the hot pasta with the dressing until the pasta is well coated. Add the mozzarella, ham, spinach and tomatoes and toss to combine the dressing. Cover and chill for 4-5 hours.
  3. Garnish with more Parmesan cheese before serving.
I brought leftovers (served over greens) with me to lunch the next day, as shown below:
*Note: The dressing contains a raw egg which is incorporated into the hot pasta. 

4.15.2012

chicken fajita salad with scallion vinaigrette


Chicken Fajita Salad with Scallion Vinaigrette
Dressing recipe below. Salad recipe not exact - this can feed one or one hundred!

Ingredients
  • Chicken breast(s) (1/2 to 1 chicken breast per salad)
  • Homemade fajita seasoning
  • Sliced, fresh mushrooms (1-2 baby portabellos per salad)
  • Yellow onion, chopped into bite-sized chunks, as shown above (1/8 - 1/4 small onion per salad)
  • Crunchy lettuce, such as Romaine, washed, dried and torn
  • Tomatoes, chopped
  • Black beans, drained and rinsed
  • Canned corn, drained and rinsed (grilled, fresh corn would be even better!)
  • Mexican cheese (I only had colby jack, which I cubed, as shown)
  • Salsa
  • Other toppings, such as jalepenos, cilantro, sour cream and lime
  • Salt/pepper
  1. Chop chicken into chunks and season chicken liberally with homemade seasoning (about two tbsp. per pound of chicken). Heat a frying pan over medium heat with a little olive oil. Add chicken and saute until pink is just gone and meat is juicy. Remove from pan. Add a little more oil, the mushrooms and the onion, and saute, seasoning with salt and pepper as needed. Remove from pan when onions are slightly browned on the edges and mushrooms are soft.
  2. Arrange salad in a large bowl by adding the lettuce, tomatoes, corn, beans, mushrooms, onions, cheese and chicken. Add salsa and desired toppings. Serve with vinegairette.
Scallion Vinaigrette 
Recipe makes about a cup of dressing and keeps well in a sealed jar on the counter for a few days.
  • 1/4 cup white wine vinegar
  • 1 tablespoon Dijon mustard (okay to go a little over!)
  • 1 teaspoon honey
  • 2 tablespoons chopped chives
  • Salt and freshly ground black pepper
  • 1/2 cup extra-virgin olive oil
  • 1/4 cup thinly sliced scallion, green and pale green part

  1. Stir the vinegar through the salt and peppper together in a shallow bowl.
  2. While whisking furiously, drizzle the olive oil into the mixture slowly, allowing it to emulsify. When the oil is completely incorporated, the dressing should be thick and consistent, as shown above. Gently stir in the scallions and taste to see if it needs additional salt or pepper.

4.14.2012

simple greens with tomatoes, mozzarella and basil-garlic dressing


Who doesn't love tomatoes and basil together? This simple salad takes those two flavors and brings in creamy mozzarella over spring greens. The combination is over the top, but is so, so simple to make. I made this salad for a gathering in advance, and whipped it out of the fridge when it was time to eat. Elegant, simple and delicious - what's not to love?

Tomatoes and basil are also well known as super healthy foods. Basil is full of Vitamin A and is said to promote cardiovascular health. Tomatoes are rich in lycopene, also good for the heart, Vitamin C and more. Adding a quality olive oil to the mix helps the body to absorb these nutrients and even fight cancer.

Simple Greens with Tomatoes, Mozzarella and Basil-Garlic Dressing
This salad has no set amount of ingredients. Make it as large or small as you need it.
  1. Mix spring mix or spinach with halved cherry tomatoes. Cube desired amount of fresh mozzarella (I buy the ball) and add to the mix. Toss gently. Top with fresh-ground black pepper.
  2. Make the Basil-Garlic Dressing as directed. This recipe makes about a cup of dressing, so reduce or double it as needed. (Save any leftover dressing for an easy Grilled Shrimp Salad later in the week, as shown in the Basil-Garlic Dressing recipe post above!)

4.02.2012

ahi tuna with grilled pineapple salsa

This meal is a crowd pleaser! I have made this for friends who are picky about fish and for large groups -and everyone loves it. The best part is that it can almost completely be made in advance, from the orange juice glaze to the salsa. Just grill the fish right before serving. This is excellent with a simple salad and yellow rice with black beans. Super healthy and super filling.

Oh, and in case you were wondering, ahi is rich in Omega-3 fatty acids, B vitamins, folic acid and more. Your heart, body and mouth will be happy!

Ahi Tuna with Grilled Pineapple Salsa
  • 1 cup fresh orange juice
  • 2 tablespoons lower-sodium soy sauce
  • 1/2 pineapple, peeled, cored, and cut into 1/2-inch-thick rings
  • 1 medium red onion, peeled and cut into 1/2-inch-thick slices
  • 4 (6-ounce) very fresh, sushi-grade ahi tuna steaks
  • Canola oil
  • Salt and pepper
  • 2 tablespoons chopped fresh basil
  • 1 tablespoon chopped fresh mint
  • Juice of one lime
  • 1 jalapeno pepper, seeded and minced
  • Extra basil or mint for garnish

  1. Prepare grill to medium-high heat. On the stovetop, boil orange juice in a small saucepan 15 minutes or until reduced to 1/4 cup. Transfer to a small bowl; stir in soy sauce.
  2. Place pineapple and onion on a grill rack coated with cooking spray.* Grill five minutes on each side or until the onion is tender and just starting to char. Remove from grill; let stand five minutes. Coarsely chop, and transfer to a bowl.
  3. Brush both sides of fish evenly with 1 tbsp. oil; sprinkle evenly with desired salt and pepper. Place fish on a grill rack coated with cooking spray; brush with half of juice mixture. Grill three minutes; turn fish over. Brush fish with remaining juice mixture; grill three minutes or until desired degree of doneness (rare is recommended).
  4. Add basil, and next three ingredients (through jalapeno) to pineapple mixture; toss. Season with salt and pepper to taste. Serve with fish; garnish with mint sprigs, if desired.
*The pineapple and onion can be charred in a frying pan indoors, as well. (I did this when it was raining outside!) Start with the pineapple and grill in batches on a dry pan over medium-high heat, turning every few minutes when the exteriors are dark and the insides are juicy. When the pineapple is grilled (as shown below), add a drizzle of canola to the pan along with the red onion, in batches if needed. When the onion is beginning to char on the edges, it's done.

3.25.2012

roast beef sandwiches with rosemary-garlic aioli

Just because something is simple doesn't mean it has to be boring. This is an easy dinner idea punched up with a flavorful condiment -  a rosemary-garlic aioli, which is just a mixture of mayonnaise and other flavors. Pair it with something green (we had a salad) and you have a dinner in under 10 minutes.

Sounds fancy, super easy. My kind of cooking.

Start with a really great bread (see whole-grain ciabatta, courtesy the Fresh Market bakery) and high-quality sliced meat and cheeses. We chose Italian roast beef (deli sliced) and creamy Havarti cheese.
Make the aioli: Mix a few dollops of mayonnaise with about a teaspoon of fresh-chopped rosemary, a turn of fresh-cracked pepper and one small garlic clove. If desired, you can also sprinkle in a little onion powder.
Assemble the sandwich with the meat and cheese and pop it under the broiler until toasty and bubbly. Smear with desired amount of aioli.

Top with lettuce, tomato slices and red onion. Enjoy.

3.20.2012

white chocolate-chunk blondies


People. These are the jam. Make these immediately. Just don't count on them being great for your bikini. But it doesn't matter ... they're that good. Go!

 
White Chocolate-Chunk Blondies
  • 10 tablespoons unsalted butter, at room temperature, plus more for the pan  
  • 1 cup walnut pieces
  • 2 cups all-purpose flour
  • 1 teaspoon baking powder
  • 1/2 teaspoon baking soda
  • 1 teaspoon salt
  • 1 1/2 cups packed light brown sugar
  • 3 large eggs
  • 2 tablespoons vanilla extract
  • 6 ounces white chocolate, cut into chunks
  • Vanilla ice cream, for topping
  1. Make the blondies: Preheat the oven to 350 degrees F. Spray 9-by-13-inch baking pan. Pulse 1/2 cup walnuts in a food processor until almost fine (do not overprocess). Whisk the ground nuts, flour, baking powder, baking soda and salt in a medium bowl.  
  2. Beat 10 tablespoons butter and the brown sugar with a mixer on medium speed until fluffy, about 2 minutes. Beat in the eggs, one at a time, scraping down the bowl with a rubber spatula. Beat in the vanilla. Gradually beat in the dry ingredients until just combined. Fold in the white chocolate and the remaining 1/2 cup walnuts.
  3. Spread the batter in the prepared pan and bake until the blondies are light brown around the edges and spring back when pressed, about 30 minutes. (Do not overbake or they will be fluffy and not dense, which is the way you want them!) Cool slightly on a rack.
  4. Cut into large bars. Serve warm topped with ice cream.

3.18.2012

tex-mex beans and peas over rice

So, I'm in a produce-eating competition at work. The idea isn't necessarily to replace your meats and carbs with produce (although I'm finding that something has to give!), but rather to incorporate a variety of colorful, fresh foods into the diet. The competition runs for eight weeks, so don't be surprised if you see more veggie-, bean- and fruit-based dishes in the next month or two!

This also means that I'm upping the ante on my already robust fresh produce intake. I'm averaging 10-12 different kinds of produce each day, which has been surprisingly easy. It just means that I have to be diligent about snacking, really. Most of the time, I get distracted by things I need to do, and I forget to eat my afternoon apple or carrots. Now, I'm making myself get up to eat. I also have discovered a yummy spinach smoothie recipe that blends the greens with yogurt, honey, cinnamon or peanut butter, a little orange juice and ice cubes. Filling and super healthy for breakfast.

So, this is a recipe that I made for lunch one Sunday. It brought in tomatoes (red and yellow), black-eyed peas and black beans for a powerhouse meal. You could also add spinach if you have it, but I had used all of mine in my morning smoothie. :)
Tex-Mex Beans and Peas over Rice
  • 1 cup white or brown rice
  • 1 tablespoon extra-virgin olive oil
  • 1 cup fresh salsa, plus more for topping
  • 1 teaspoon ground cumin
  • Black pepper
  • 1 14-ounce cans black-eyed peas (undrained)
  • 1 14-ounce black beans (drained and rinsed)
  • 3 cups baby spinach
  • 1/4 cup chopped fresh cilantro
  • 1 cup shredded cheddar cheese 
  • Sour cream, avocado, tomato wedges and lime, for serving (optional)
Cook the rice as the label directs. Meanwhile, heat the olive oil in a medium saucepan over medium-high heat. Add the salsa and cumin and cook, stirring, until the salsa is soft, about five minutes. Add the black-eyed peas, plus the liquid from one of the cans. Cook, stirring occasionally, until the beans are creamy and tender, about 12 minutes. Add some black pepper to taste.

Fluff the rice with a fork and divide among bowls. Add the spinach and cilantro to the black-eyed pea mixture and stir until wilted, about one minute; spoon evenly over the rice. Top each serving with a few avocado slices, some cheese and more salsa. Serve with desired toppings.

3.11.2012

texican turkey calzones

These are delicious. And lean. And ... Mexicany. Perfect.

It seems that I've been on a Mexican kick lately; I've just realized that. But, who's complaining? This filling meal-in-a-pocket is made with lean turkey, onions, peppers, tomatoes, garlic and yummy spices - all of which is good for you! Enjoy with spicy toppings, avocado, sour cream, cilantro and lime.

Texican Turkey Calzones
Serves 4
Ingredients:
  • 8 oz lean ground turkey
  • 1/2 c chopped onion
  • 1/2 c green bell pepper
  • 1/2 c red bell pepper
  • 1 tsp cumin
  • 1/2 tsp chili powder
  • 2 garlic cloves, minced
  • 1/2 c salsa
  • Handful of fresh, chopped cilantro
  • Salt, pepper
  • 1 ball or tube of refrigerated pizza dough (about 11 oz.)
  • 3/4 c Mexican or cheddar cheese, shredded
  • 1 egg
  • Toppings
Directions
  1. Preheat oven to 425. Spray a foil-lined baking sheet with cooking spray.
  2. Heat a large, deep skillet over medium-high heat. Add ground turkey and cook until pink is just gone, stirring to crumble. Remove from pan, wiping out any excess fat. Add a little olive oil to the pan and add the onion through garlic. Season with salt and pepper. Cook about four minutes, or until the vegetables are tender. Add turkey and salsa to pan. Reduce heat to low and allow to sit for a few minutes. Taste and add more cumin, chili pepper, salt and pepper if needed.
  3. Unroll or roll out dough. Divide into four equal portions. Spoon ~1/2 c portions onto the dough squares and top with 3 tbsp. cheese each (I used a shallow bowl to hold the dough for this step, as shown above). Fold dough over and pinch seams tightly. Place all four calzones on the foil-lined, greased baking sheet.
  4. In a small bowl, whisk the egg. Brush egg evenly over the tops of each calzone and sprinkle with a small amount of chili powder (I also added dried parsley for color). Bake calzones for 12-13 minutes, until tops are browned and the bottoms are cooked. Serve with desired toppings.
Note: I tripled the recipe for a get-together, which is why the photos show an alarming amount of food!
Pin It

3.07.2012

tangy dijon-prosciutto pizza


Pizza is easily one of my favorite foods. And this unusual recipe sounded too intriguing not to try. It blends tangy Dijon mustard with a buttery, garlicky white sauce that has a light base of skim milk and flour. It comes together to form a creamy, almost-Alfredo sauce that is, by comparison, fairy guiltless. Give it a try when you want something fresh and different. Just make sure to leave leftovers and eat a big, fat salad with it.


Tangy Dijon-Prosciutto Pizza 
  • One ball fresh pizza dough
  • 3/4 cup skim milk
  • 2 teaspoons Dijon mustard
  • 1/2 teaspoon freshly ground black pepper 
  • 1 large egg yolk
  • 1 1/2 tablespoons butter or olive oil
  • 1 1/2 teaspoons minced fresh garlic
  • 2 teaspoons all-purpose flour
  • 1 1/4 cup shredded Gruyère cheese
  • 2-3 ounces thinly sliced prosciutto, torn
  • 1 tablespoon chopped fresh chives
  • Corn meal
  1. Allow your dough to rise per package directions. Roll it out on a floured, clean surface. Preheat the oven to 400 (or whatever your dough package directs) with a pizza stone inside.
  2. While the oven and stone preheat, combine milk and next three ingredients (through egg yolk) in a medium bowl, stirring with a whisk. Melt butter in a medium saucepan over low heat. Add garlic to pan; cook for three minutes or just until butter and garlic begin to brown, stirring frequently. Add two teaspoons all-purpose flour to pan, and cook 30 seconds, stirring constantly with a whisk. Stir in milk mixture, and bring to a boil. Cook for one minute or until thick, stirring constantly with a whisk.
  3. When the dough and sauce is ready, pull the hot stone from the oven and sprinkle with corn meal. Lay the dough on top and spread sauce in an even layer, leaving a 1/4-inch border; sprinkle sauce evenly with cheese. Slide parchment and pizza onto preheated pizza stone. Bake for 20-25 minutes or until crust is golden, and the cheese is bubbly and brown. Arrange prosciutto on pizza, and sprinkle with chives. Serve immediately. 
Pin It

3.04.2012

whole-grain blueberry coffee cake

Sunday morning breakfast perfection. This is a guiltless coffee cake that could be served for breakfast or dessert. It's layered with lightly sweetened cake, juicy blueberries (you know how I feel about those), cinnamon and walnuts. So good, no one will no that it's low-fat, high-fiber and, dare I say, healthy?
Whole-Grain Blueberry Coffee Cake
Courtesy Ellie Krieger
  • 1 cup all-purpose flour
  • 1 cup whole-wheat pastry flour or regular whole-wheat flour
  • 1 teaspoon baking soda
  • 1/2 teaspoon salt
  • 3 tablespoons sugar
  • 1/2 teaspoon ground cinnamon
  • 1/2 cup chopped walnuts
  • 1/2 cup packed brown sugar
  • 2 tablespoons butter, at room temperature
  • 2 tablespoons canola oil
  • 2 large eggs
  • 1 teaspoon vanilla extract
  • 1 cup plain nonfat yogurt (I used vanilla)
  • 1 cup fresh blueberries, or frozen and thawed
  1. Preheat oven to 350 degrees. Spray an 8-inch square cake pan with cooking spray.
  2. Whisk together the all-purpose and whole-wheat flours, the baking soda and salt. In a small bowl, stir together the granulated sugar, cinnamon and walnuts. In a large bowl, beat the brown sugar, butter and oil until fluffy. If necessary, use the back of a spoon to press out any lumps in the brown sugar. Beat in the eggs, one at a time, beating until fully combined. Beat in the vanilla and yogurt. 
  3. Add the flour mixture in 2 batches, stirring until just combined.
  4. Spread half of the batter into the prepared pan. Sprinkle half of the nut mixture over the batter and top with the blueberries, gently pressing them into the batter. Spoon the rest of the batter into the pan (as shown above), smoothing the top. Sprinkle the remaining nut mixture over the cake, pressing gently.
  5. Bake until a wooden toothpick inserted in center comes out clean, about 30 to 35 minutes. Let cool slightly before serving. Cut the cake into 2-inch squares. Note: I have made this several times and am always surprised that it needs longer to cook. It might be my oven, but keep cooking it until the middle, bottom layer comes out clean with a toothpick, otherwise it will be gooey when you serve it.

Pin It

2.26.2012

oatmeal-flax chocolate chip cookies


Full disclosure: I snagged this one from the Food Network Magazine, and didn't change a thing. They are delicious and I couldn't even taste the flax! This would be a great way to sneak it into a kid's diet with one or two for dessert - just remember that they are still cookies and therefore still contain hefty amounts of butter and sugar! Enjoy.

Oatmeal-Flax Chocolate Chip Cookies
Ingredients
  • 1 1/2 cups all-purpose flour
  • 1 cup quick-cooking oats
  • 1/4 cup flaxseed, finely ground in a spice grinder
  • 1 teaspoon baking soda
  • 1/2 teaspoon salt
  • 1/2 teaspoon ground cinnamon
  • 12 tablespoons (1 1/2 sticks) unsalted butter, softened
  • 1 cup granulated sugar
  • 3/4 cup packed dark brown sugar
  • 2 large eggs
  • 1 teaspoon vanilla extract
  • 1 cup semisweet chocolate chips

Directions
  1. Preheat the oven to 350 degrees F. Line two baking sheets with parchment paper.
  2. Whisk the flour, oats, flaxseed, baking soda, salt and cinnamon in a bowl.
  3. Beat the butter, granulated sugar and brown sugar in a large bowl with a mixer on medium-high speed until fluffy, about four minutes. Beat in the eggs one at a time, beating well after each addition. Beat in the vanilla. Reduce the mixer speed to low; add the flour mixture and beat until just combined, scraping down the bowl as needed. Stir in the chocolate chips.
  4. Drop heaping tablespoonfuls of dough onto the prepared baking sheets, about two inches apart. Bake until golden brown, 10 to 12 minutes. Let the cookies cool three minutes on the baking sheets, then transfer to racks to cool completely.
Pin It

2.25.2012

tortilla torte from my childhood

This meal is a blast from the past (circa 1993-ish) for me. That year, a summertime ear infection from too many days in the pool prompted my stepmom to take me to the doctor for treatment. In the waiting room, she came across this recipe while flipping through a magazine and thought she'd try it out for dinner. And with four growing girls, she liked that it was a large, filling dish. One taste and we were all hooked!

This has been a family favorite ever since then, although I've added a couple of things, including sauteed onions and garlic, whole-wheat tortillas, extra spices and a can of  green chilies for flavor. Serve it with hot sauce or jalapenos, sour cream and salsa, and a big, fat salad for a great, healthy dinner!

Tortilla Torte
Ingredients
  • 1 lb lean ground beef
  • 2 cans diced tomatoes, undrained
  • 1 small can diced green chilies, undrained
  • 1 can black beans, drained and rinsed
  • 1 small onion, chopped
  • 2-3 garlic cloves, minced
  • 1 tsp. cumin
  • 1/2 tsp chili powder
  • 3 large whole-wheat tortillas
  • 2 c cheddar or Mexican cheese blend, shredded
  • Salt, pepper, olive oil
  • Toppings such as: salsa, sour cream, cilantro, spicy things
  1. Start by sauteing the beef over medium heat. When the pink is just gone, remove from pan and allow to drain on paper towels to remove any extra fat. Wipe any excess fat from the pan and add a swirl of olive oil, the onions and garlic, and some salt and pepper to taste.
  2. When the onions are transclucent, add the beef back to the pan, along with the tomatoes, chilies, beans and spices. Stir together and allow to cook together for five or so minutes.
  3. Spray a cast-iron skillet and lay the first tortilla down. Using a slotted spoon, transfer 1/2 of the filling and 1/3 of the cheese on top, spreading it evenly over the tortilla. Repeat the process until you have two layers of the meat-bean-cheese goodness, topping with the final tortilla with the remaining 1/3 of cheese.
  4. Cover the cast-iron pan with a lid and cook over medium-low heat until the cheese is melty on a layer or two below the top tortilla. Throw it under the broiler until the top is toasty and the torte is bubbly, like below (5-7 mins).
  5. Serve immediately with salsa, sour cream, hot sauce, jalapenos, cilantro and any other toppings you like.
Pin It

2.22.2012

stuffed sweet potatoes with spinach and bacon


Yeah. I said it: sweet potatoes and bacon. They've officially entered each other's worlds. Yeah. This recipe manages to blend sweet and savory all in one healthy side dish. And for those who love nutmeg, it really adds a lot to this dish. I am not a huge fan of it when it is overdone, but this is the perfect amount to add an earthy, "something-in-the-background" flavor. This would be awesome with a steak or pork.

Stuffed Sweet Potatoes with Spinach and Bacon
Ingredients
  • 4 sweet potatoes (about 8 ounces each)
  • 4 thick slices of natural bacon or 2 ounces sliced pancetta (about 8 thin slices)
  • Handful of spinach or 1 bunch broccoli rabe, tough stems trimmed, roughly chopped
  • 8 ounces mushrooms, stemmed and sliced
  • 2 cloves garlic, thinly sliced  
  • 1/8 teaspoon red pepper flakes  
  • 1/2 cup part-skim ricotta cheese  
  • 2 tablespoon finely grated Parmesan cheese
  • Freshly grated nutmeg
  • Salt and pepper

  1. Wash, dry, prick the sweet potatoes with a fork and bake the sweet potatoes for 45 minutes to an hour, or until soft. Meanwhile, cook the bacon in a large skillet over medium heat, turning once, until crisp, about four minutes. Remove from the skillet and drain on paper towels. Increase the heat to medium high; add the spinach and 1/4 teaspoon salt and pepper to the skillet and cook, stirring occasionally, about three minutes. Add the mushrooms, garlic and red pepper flakes and cook, stirring occasionally, until the vegetables are tender, about three more minutes.
  2. Mix the ricotta, Parmesan, and nutmeg to taste in a small bowl. Split open the sweet potatoes lengthwise and fluff the flesh with a fork. Top each with 1/8 of the ricotta mixture, then top evenly with the spinach mixture and the remaining ricotta mixture. Chop the bacon and sprinkle evenly on top.

Pin It